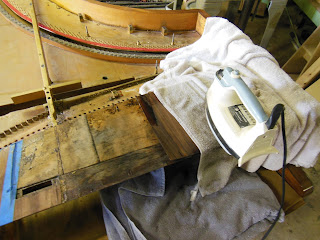
Now the veneer can start to come off the top of the stretcher assembly. I used to be terribly afraid of this, but the trick is not to use a hot iron. Instead set the iron on the lowest setting, so that the temperature gradient is not too great, and the glue has a chance to get warm before outside burns. I use a clean wet, but not sopping, towel between the iron and the veneer, and, of course, the veneer has been stripped of finish. If you want to preserve the finish this is not the method. Plenty of patience is required, which with me, is always in short supply. Use a spray bottle of water and keep the towel wet. When the veneer begins to loosen work a thin, but not sharp blade underneath.
Now we can see that the top of the stretcher is made of several pieces, with small slips of veneer between them, and that one of the joints coincides with the central plate strut. Also we see that the front piece, which is a curved moulding that covers the fall board, is a separate piece, and thank God for that! This front piece, although glued, slides down from above on splines, and is retained by a pair of wooden locks, see below.
This lock is a small piece of Maple, only about 1/8 of an inch thick which extends into the rim by the same amount. Using white vinegar this piece can be loosened, and if the stretcher piece is tapped down slightly the piece will pop loose.
Here I am loosening the top joint with white vinegar, this was fairly easy, as this joint was coming apart already. In fact this could be seen before the veneer was removed. The gluing surface is only about 3/4 of an inch high, because there is an iron bar behind this panel, the edge of which can be seen from below.


Comments
Post a Comment